Finishing up the Tulsa Spur Switching Layout
- Stephen Strum
- Nov 18, 2020
- 7 min read
Updated: Jan 29, 2021
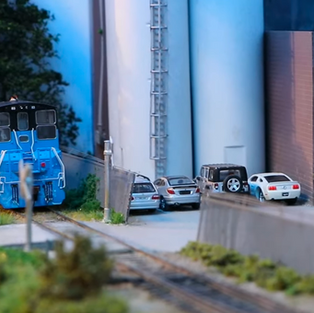
After taking about 10 months off from working on the switching layout, I finally finished the layout. I'll probably still add a few more details and some additional lights and such, but the layout is effectively complete at this point.

First off I needed to cut out some openings for battery holders and a toggle switch to power and control the layout lighting. I decided to make the lighting battery powered since I can already operate the layout with a battery-powered throttle unit and so that would make it easy to take to display at train shows if I decide to do that eventually.
I drilled holes in the corners of the opening I needed to make for the battery holder and then used a spade bit to drill a hole for the toggle switch. I used my coping saw to cut out the opening for the battery holder though a jigsaw would have been a little faster. I test fit the battery holder then glued it in place with some hot glue. I attached the toggle switch to a leftover cover from a project box and then hot glued that in place as well.

With the lights wired up, I wanted to move onto some scenery work. While the scenery was already done, I didn't really like how it looked, and the large trees got in the way of operations. I removed the largest tree and then scrapped off some of the existing scenery. I decided to use a static grass mat that I cut to size for the front of the layout. This worked really well, though I could have just as easily broken out the static grass applicator. But, since I hadn't used a static grass mat before, I wanted to try that out. I applied some additional pieces of shrub material that I saved from the original scenery, and then glued everything down with my usual diluted matte medium mixture.

Next, since I wanted to build the layout into a shadow box, I needed to remove the existing backdrop. I was worried the structures would be damaged when removing the backdrop, but the backdrop came off easily without any issues. I built the shadow box out of some 1/2" birch plywood. I ripped down the plywood into the approximately 14" width of the layout, and test-fit the end pieces. I had to splice together a few pieces of plywood for the top since I didn't have a single piece long enough. I test fit that and then sanded everything with my orbital sander, patched the seams, and when that was dry and sanded again, I painted the inside of all the pieces with white paint to serve as a primer.

I glued and nailed the sides to the top of the shadow box unit and then glued and nailed on a 1x2 piece of clear pine to the top to add needed rigidity to the long span of plywood.

I test fit the shadow box on the layout once again, and then took a piece of 1/4" MDF and propped it up against the back of the layout. I used a pen to trace out where I needed to cut the MDF to fit snuggly against the side and top. I cut that piece to size, and then made a notch on one end to fit around the raised side of the layout. I put that piece on the layout, and took my next sheet of MDF and again traced out the area I needed to cut, and cut that sheet to size as well.

I used my framing square to make sure everything was lined up properly and proceeded to glue on a splice plate on the back along with strips of 1/2" by 2" pieces of poplar. These were added to provide stiffness to the backdrop and to provide more material for attaching the backdrop to the sides and top of the shadowbox. I also glued on a couple of pieces of MDF on the bottom that extended down a few inches so I could attach those to help hold the backdrop to the base of the layout.

Next, I glued the backdrop in place, using clamps to hold everything securely while the glue dried. While the dogs checked out my progress, I used some patching plaster to fill in the gaps and seams. I later came back and used some painter's caulk along the joint between the backdrop and top as well.

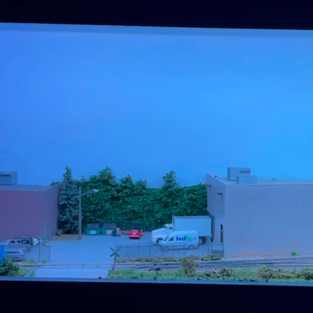
I wanted a very pale blue backdrop color so I mixed up some leftover white paint into one can and then added a dollop of dark blue paint and mixed everything up thoroughly. I painted the entire interior of the shadow box with the light blue paint mixture, let that dry, and then added a second coat.

I also wanted some trees on the backdrop between two of the structures. I cut a piece of chipboard to fit the opening, and then glued on pieces of supertree material. That was then spray painted with camouflage brown and when dry, soaked with diluted matte medium. A couple of layers of green ground foam were then added with a couple of additional coats of the glue mix.

While that dried, I worked on adding the lighting to the top of the shadow box. I used two stick-on LED strip lights I picked up at Home Depot for $10 each. These are USB powered and can be powered for hours using a small battery bank when the layout is traveling or plugged into my outlet when on the shelf above my workbench. I also added a little hot glue in places to make sure the light strips wouldn't fall off a few months from now.

The color-changing LED strips have a slight bluish cast to them when in white light mode which enhances the blue color of the backdrop. I may eventually add a warm white LED light strip to the top as well.

With the painting done and lights installed, I screwed the shadowbox to the layout base and then glued on the tree background in between the two structures on the left side of the layout. I did have to touch up the backdrop paint in a few spots as well.
I glued and nailed a couple of pieces of 1x2 pine to the left and right side of the shadow box and then put the layout up on blocks like an old car.
I painted the exterior of the layout with black paint including the original front fascia. After a second coat of paint, I put on a couple of coats of my usual mix of matte and gloss medium to help protect the paint finish.

To help hide the left side of the layout I made several more trees, using supertree armatures. I sprayed the plant material with camouflage brown paint, and when that was dry, sprayed them down with diluted matte medium and covered them with a couple of shades of ground foam and scale leaves. I poked holes in the scenery on the left side of the layout and then glued those trees in place to hide the end of the track on that side of the layout. These trees really improve the appearance of that end of the layout and make it look like the track continues off the side of the layout.

With the layout about done I test fit it on the shelf above my work desk. I had to take it down to remove a few screws that were in the way, and then put it back up on the shelf. I temporarily held in place with a clamp and then came back and added a few screws to keep it from falling off the shelf.
Lastly, I made a cover for the front of the layout using a few black garbage bags. I taped them together with some packing tape, both front, and back, and then wrapped the bottom of the bags around a strip of poplar and taped that in place as well. The poplar board adds weight to help hold the plastic down and against the front of the layout.
I taped the top of the plastic to the top of the layout using more packing tape and then tested rolling the plastic up and down to see how it would work. I may eventually use some nicer looking plastic, but this will work great for now.

Finally, I numbered my car card slots again, put my car cards back in place, and then everything was ready for operations once again.
And so that wraps up the 1x6 foot HO scale switching layout. The layout was originally built to fit into some bookshelves in my office, but the office was redone and so this layout wouldn't fit. The new version of the layout in the shadowbox looks better and offers some needed protection to the layout. The design allows me to keep dust off the layout and helps to prevent things from falling on it from the shelf above the layout.
The LED light strips allow for night mode during operation and is a great added feature as well.
The simplified scenery at the front of the layout makes operation easier since I don't have to worry about bumping my hand into one of the trees. The takeaway here is to not be afraid to redo sections of your layout if you don't like how they turned out the first time.
Here is a quick look at a great forklift I just built for the layout as well that is a Walther kit. The kit hardly needs any glue since almost all the parts just snap together. After assembling the kit I just painted the whole thing with neolube and then sprayed it down with isopropyl alcohol to weather the kit and make it look more realistic with just a minute or so of effort. I think it turned out pretty good and I highly recommend the kit.

Here is a look at how the layout is positioned above my work desk in the garage. I'll often operate the layout for 5-10 minutes while waiting for some glue or paint to dry on a project I have at the desk, and so having the layout in the garage is actually something I enjoy now.

You can watch a video of how I operate the layout with my car-cards here: https://youtu.be/DeCPYczsZjs
It is a very simple operation method which I really like using.
Anyway, I hope you enjoyed the completion of the Tulsa Spur layout project. I'll have a compilation video showing the complete construction of the layout from start to finish coming up here in the next few weeks and then I'll be starting up a few more project layouts. I'll have videos on those this winter and spring, so be on the looked for the new projects.
You can watch the video on the final construction of this layout project below.
As an Amazon Affiliate, I earn a small commission on any purchases made through Amazon links on this page.


Comentários